Installing QGIS
I am a GIS enthusiast. Mostly what I do is make maps, create and manage GIS softwares and I Iove R and am learning to appreciate Python. So mainly am a learner in GIS and programming and I like to explore integration of various programming algorithms with GIS.
In the previous post on GIS method, we mentioned about QGIS. In this post I will discuss on how to install it in both Windows and Ubuntu operating systems.
As mentioned before, QGIS is an open-source geographic information system (GIS) software that allows for the editing, visualization, analysis and modelling of spatial data. It is freely available and can be downloaded to run on a variety of operating systems such as Windows, Mac and Linux.
Installing QGIS in Windows
a). Go to the QGIS download page and download the latest 64bit version of QGIS for windows. For now it is QGIS 3.16.2 'Hannover'. Click the link to download the installer.
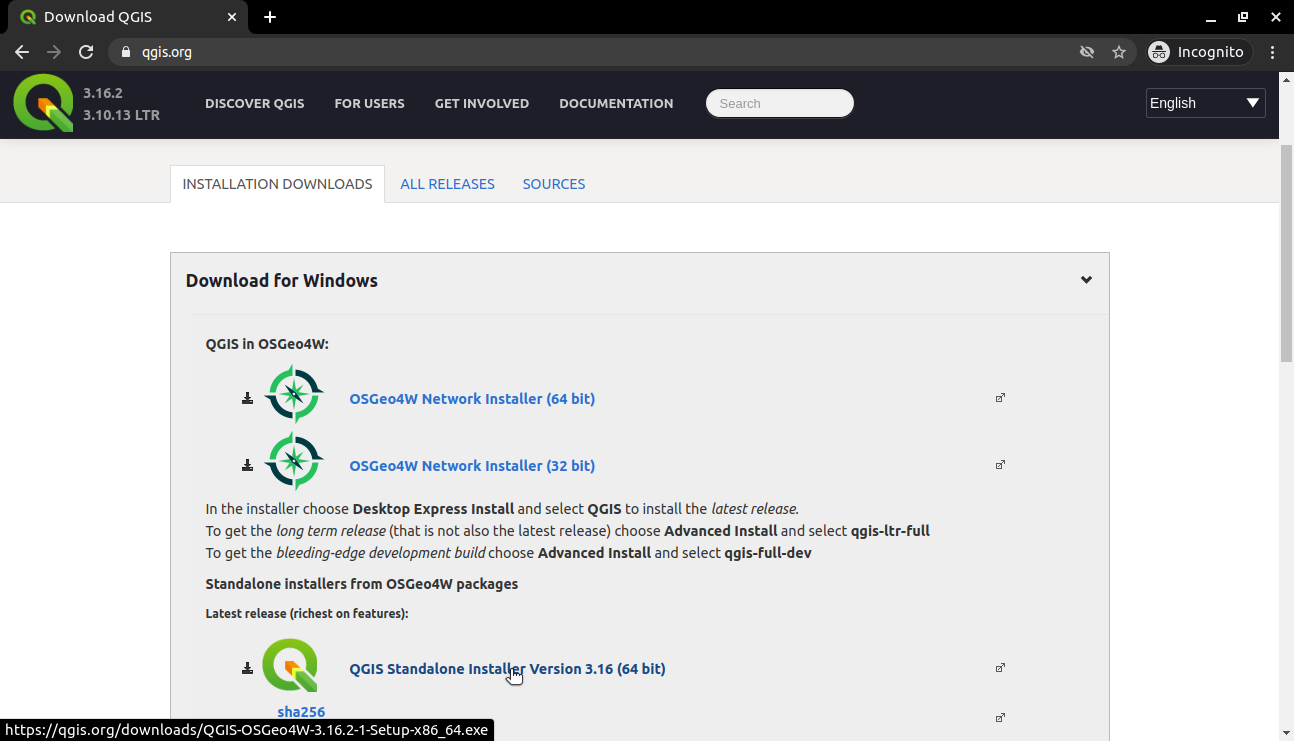
Your browser will download the file to the browsers default download directory.
b). Navigate to the directory that the file has been downloaded to.
c). Double click on the file QGIS-OSGeo4W-3.16.2-1-Setup-x86_64.exe. You will get a popup window with a security warning.
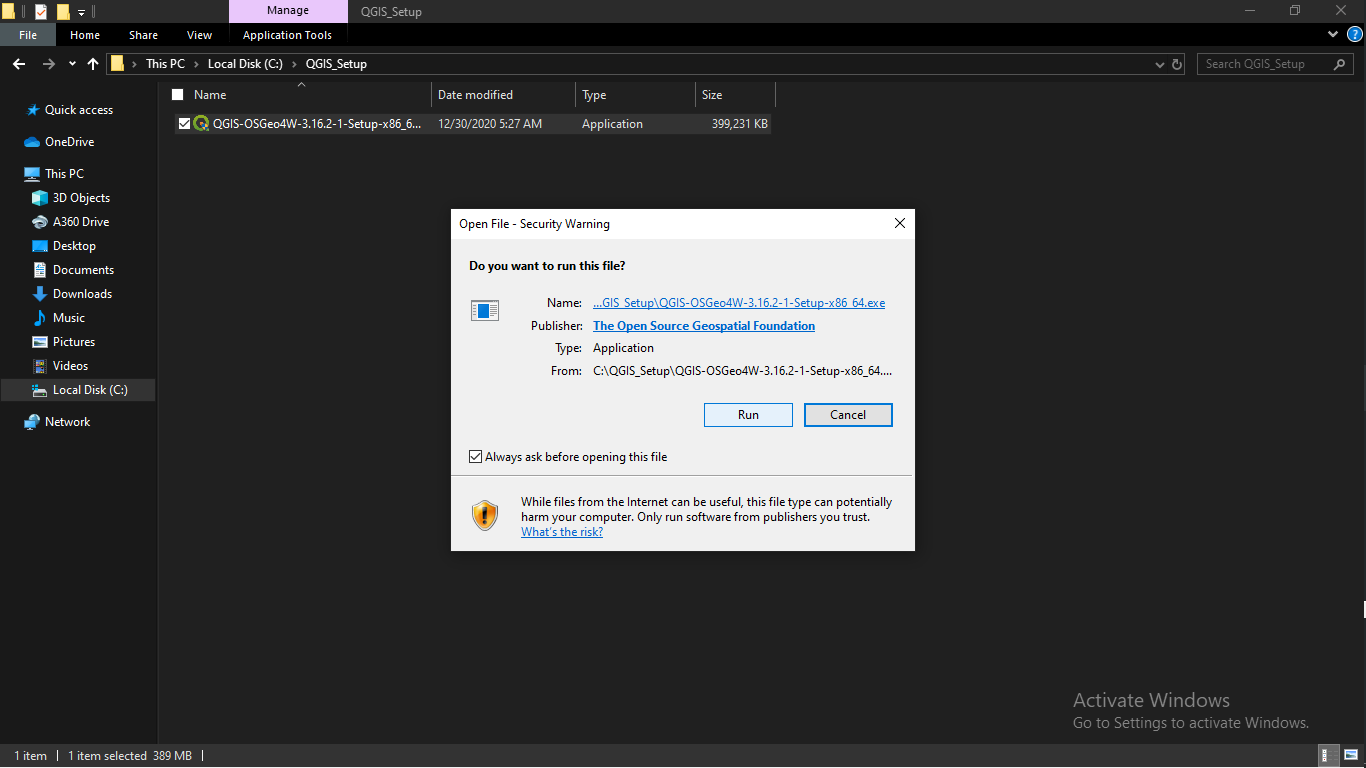
d). Hit the run button to start the installation process and follow the prompts.
There is no need to install the datasets suggested by QGIS.
Installing QGIS in Ubuntu
The installation steps are for Ubuntu 20.04, but the steps also work for previous Ubuntu versions.
If you do not have Ubuntu 20.04 installed, you could follow this link to install ubuntu 20.04 alongside windows or if you want to upgrade to Ubuntu 20.04, you can first uninstall the previous version by following this link.
The QGIS installation will be done through the Ubuntu terminal and to run the commands you must have sudo priviledges. You can open the Ubuntu terminal by pressing the keys CTRL + ALT + T or in the GUI, go to Activities» Search for Terminal.

To install QGIS on ubuntu 20.04 follow these steps:
a). Install some tools you will need:
sudo apt install gnupg software-properties-common
b). Now install the QGIS Signing Key, so QGIS software from the QGIS repo will be trusted and installed:
wget -qO - https://qgis.org/downloads/qgis-2020.gpg.key | sudo gpg --no-default-keyring --keyring gnupg-ring:/etc/apt/trusted.gpg.d/qgis-archive.gpg --import
sudo chmod a+r /etc/apt/trusted.gpg.d/qgis-archive.gpg
After installing the QGIS Signing Key, it will return something like this:

c). Add the QGIS repo for the latest stable QGIS (3.16.x Hannover).
Note: “lsb_release -c -s” will return your distro name:
sudo add-apt-repository "deb https://qgis.org/debian `lsb_release -c -s` main"
Update your repository information to reflect the QGIS repository that has been added:
sudo apt update
Now, install QGIS with Grass as well:
sudo apt-get install qgis python3-qgis qgis-plugin-grass
The installation process of QGIS is complete at this point.
Now you can go to Activities of GNOME desktop environment or Application Menu of other desktop environments and look for QGIS and you should be able to find the logo of QGIS Desktop. To open QGIS, click on the QGIS Desktop logo.
The QGIS installed in ubuntu comes with a packaged GDAL. However it cannot read or write .ecw files. However, the QGIS installed in windows can read .ecw files.
ECW (Enhanced Compression Wavelet) is a proprietary wavelet compression image format optimized for aerial and satellite imagery.
Below I have outlined how to compile the ECW plugin and GDAL from source based on this bogind's github repository.
Setting up QGIS in Ubuntu to read and write .ecw files
a). Install and build the required libraries:
sudo apt install g++ build-essential autoconf automake m4 libtool gcc make unzip wget libgdal-dev swig ant
b). Download libecwj with:
wget https://s3-ap-southeast-2.amazonaws.com/adamogradybackups/libecwj2-3.3-2006-09-06.zip
Or
wget https://github.com/bogind/libecwj2-3.3/raw/master/libecwj2-3.3-2006-09-06.zip
c). Unzip the downloaded file
unzip libecwj2-3.3-2006-09-06.zip
d.) Download and install required patches:
wget http://trac.osgeo.org/gdal/raw-attachment/ticket/3162/libecwj2-3.3-msvc90-fixes.patch
patch -p0< libecwj2-3.3-msvc90-fixes.patch
wget http://osgeo-org.1560.x6.nabble.com/attachment/5001530/0/libecwj2-3.3-wcharfix.patch
wget http://trac.osgeo.org/gdal/raw-attachment/ticket/3366/libecwj2-3.3-NCSPhysicalMemorySize-Linux.patch
cd libecwj2-3.3
patch -p0< ../libecwj2-3.3-NCSPhysicalMemorySize-Linux.patch
patch -p1< ../libecwj2-3.3-wcharfix.patch
e). Build the libecwj library
./configure
sudo make
sudo make install
f). Download and install GDAL that was packaged in QGIS:
This will involve the following steps:
i). First check the existing GDAL version with:
gdalinfo --version
For my case it returned:
GDAL 3.0.4, released 2020/01/28
ii). Next, download and install a similar version from the GDAL repository .
Therefore for my case:
wget -c http://download.osgeo.org/gdal/3.0.4/gdal-3.0.4.tar.gz
tar -xvzf gdal-3.0.4.tar.gz
cd gdal-3.0.4
iii). Then configure and install GDAL:
It is recommended to configure and install also curl, postgres, python and spatialite.
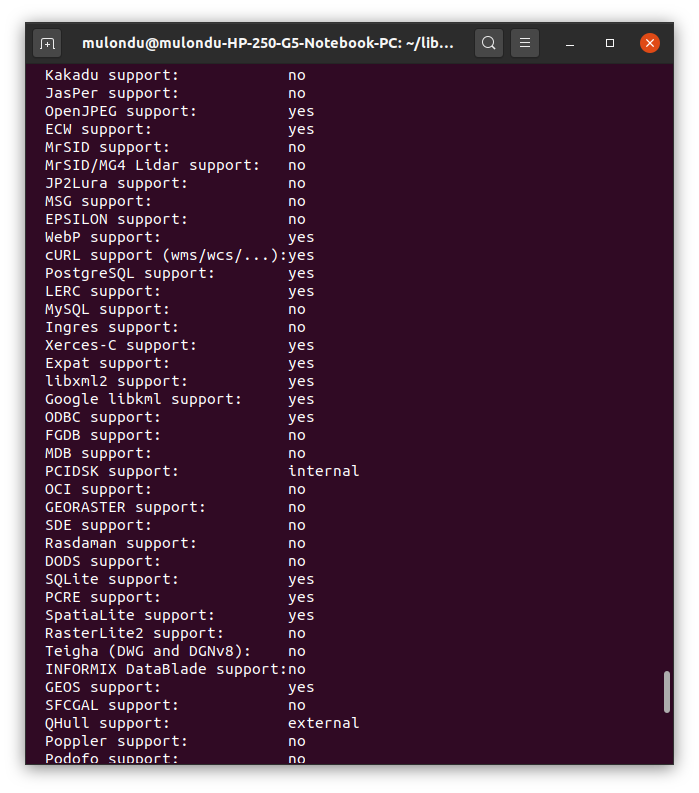
./configure --with-ecw=/usr/local --with-python --with-spatialite --with-pg --with-curl
Make sure you see ECW support marked as yes on the list
iv). Then build and install GDAL
sudo make
sudo make install
v). Then set the PATH and LD_LIBRARY_PATH environment variables so that GDAL could recognise the location of the ECW library (by default /usr/local/lib).
The easiest way found is doing this is:
echo 'export LD_LIBRARY_PATH=/usr/local/lib' >> ~/.profile
echo 'export LD_LIBRARY_PATH=/usr/local/lib' >> ~/.bashrc
sudo ldconfig
vi). Next, add the following rows to /etc/enviroment
GDAL_DATA="/usr/local/share/gdal"
PATH="/usr/local/sbin:/usr/local/bin:/usr/sbin:/usr/bin:/sbin:/bin:/usr/games:/usr/local/games"
vii). To test if the installation was successful, run:
gdalinfo --formats | grep ECW
It returns this:
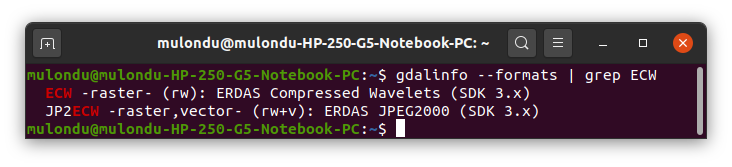
Congratulations now you have installed QGIS and also configured it to read and write .ecw files!


